| 일 | 월 | 화 | 수 | 목 | 금 | 토 |
|---|---|---|---|---|---|---|
| 1 | 2 | 3 | 4 | 5 | 6 | 7 |
| 8 | 9 | 10 | 11 | 12 | 13 | 14 |
| 15 | 16 | 17 | 18 | 19 | 20 | 21 |
| 22 | 23 | 24 | 25 | 26 | 27 | 28 |
- Snackbar
- CrossAxisAlignment
- HTTP
- Flutter Example
- node.js
- WillPopScope
- Hello World
- Column Widget
- Image.network
- Cached Image
- Networking
- Row
- navigator
- Row Widget
- FutureBuilder
- AppBar
- Flutter 앱 배포
- sqlite
- 반석천
- flutter
- MainAxisAlignment
- Scaffold
- listview
- Flutter 예제
- Load Image
- InkWell
- Flutter Tutorial
- ListTile
- Flutter 강좌
- ListView.builder
- Today
- Total
꿈꾸는 시스템 디자이너
Flutter 강좌 - [Firebase] Firebase 연동 방법 본문
Flutter Code Examples 강좌를 추천합니다.
- 제 블로그에서 Flutter Code Examples 프로젝트를 시작합니다.
- Flutter의 다양한 예제를 소스코드와 실행화면으로 제공합니다.
- 또한 모든 예제는 Flutter Code Examples 앱을 통해 테스트 가능합니다.
Flutter Code Examples 강좌로 메뉴로 이동
Flutter Code Examples 강좌 목록 페이지로 이동
Flutter Code Examples 앱 설치 | Google Play Store로 이동
Flutter Code Examples - Google Play 앱
Are you a beginner at Flutter? Check out the various features of Flutter through the demo. Source code for all demos is also provided.
play.google.com
Flutter 강좌 시즌2 목록 : https://here4you.tistory.com/149
1. Firebase 프로젝트 준비
우선 새로운 Firebase 프로젝트를 생성하기 위해 Firebase 콘솔로 접속한다. 처음 사용자는 회원가입이 필요하다.
이미 생성한 프로젝트들도 보인다.
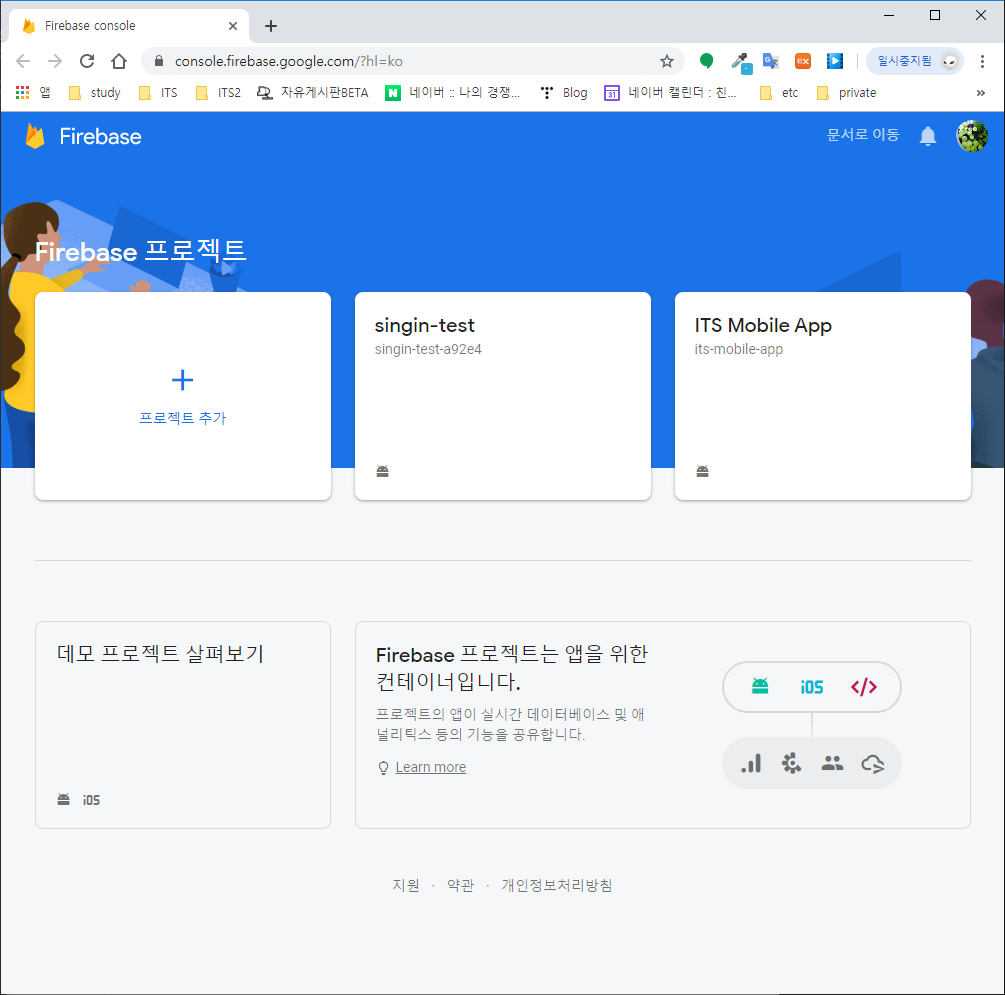
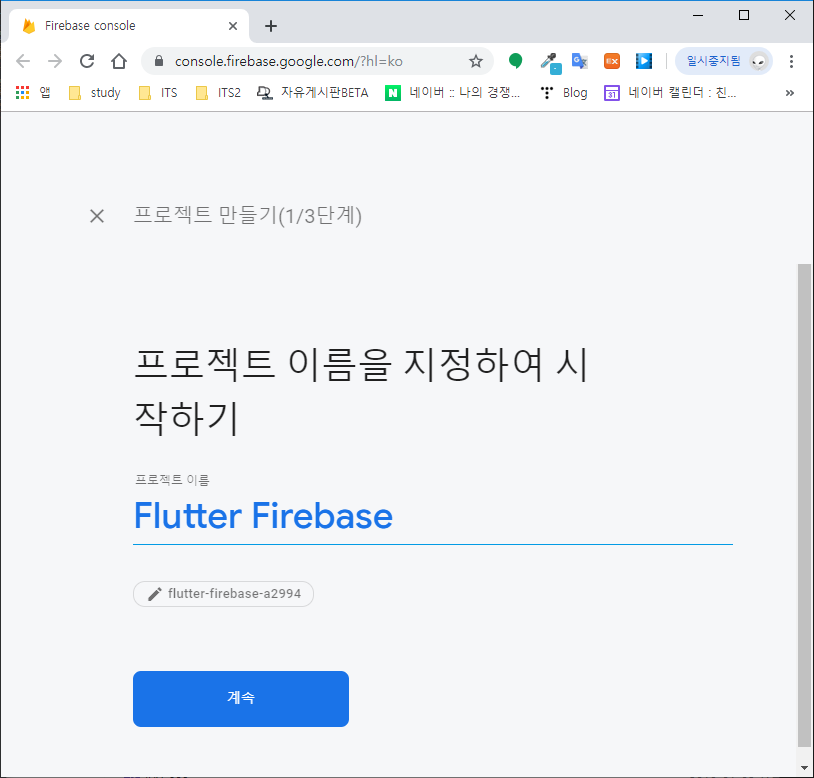
프로젝트 추가를 눌러 새로운 Firebase 프로젝트를 생성한다. 프로젝트 이름을 입력한 후 계속을 선택한다.
Google 애널리틱스의 사용 여부를 확인한다. 권장사항인 사용 설정으로 선택한 후 계속을 선택한다.

Google 애널리틱스 계정을 선택한 후 프로젝트 만들기를 선택한다.

프로젝트가 생성되었다. 계속 버튼을 선택하여 프로젝트 화면으로 이동한다.

다음과 같이 프로젝트(Flutter Firebase) 페이지를 확인할 수 있다.

우선 간단히 개발메뉴를 살펴보면 6개의 기능을 제공하고 있다.
- Authentication
서버 기반의 서비스를 제공하는 앱이라면 사용자의 가입과 로그인 기능이 필수인데, Firebase에서는 이 기능을 제공하고 있어서 직접 구현할 필요가 없다.
- Database(Cloud Firestore)
서비 기반의 서비스라면 데이터베이스도 필요할 것이다. Firebase에서 제공하는 Database는 실시간으로 업데이트되고 특히 오프라인 자원을 제공하여 앱이 인터넷에 접속할 수 없거나 지연이 발생할 때에도 유연하게 서비스가 가능하다고 하다.
- Storage
서버 측 코드 없이 이미지, 오디오, 동영상 등을 앱에서 사용할 수 있도록 한다.
- Hosting
웹 사이트를 운영할 수 있는 호스팅 서비스도 제공한다.
- Functions
함수를 작성하고 배포할 수 있는 기능을 제공한다. 물리적(혹은 논리적) 서버의 구성 및 개발 없이 함수만 작성하고 배포하면 앱에서 사용할 수 있는 서버 측 API가 된다(고 알고 있다).
- ML Kit
머신 러닝에 관련된 것이나 아직 잘 모르는 항목이다.
서버 기반의 서비스를 제공하는 앱이라면 위에서 설명한 기능들이 필수적이며 기존에는 직접 다 개발해왔다. 하지만 Firebase를 이용하면 서버를 직접 구현하지 않고도 서버 기반의 서비스를 개발할 수 있는 장점이 있으며 이를 위해 앱을 Firebase와 연동해야 한다.
2. Firebase와 연동할 앱 생성
Firebase를 연동할 새로운 Flutter 앱을 생성한다.
Android Studio를 이용해서 새로운 Flutter 앱을 하나 생성하면 끝이다.
3. Firebase에 Flutter 앱 추가
프로젝트 화면의 상단에 위치한 안드로이드 아이콘을 선택하여 앱을 추가한다.

Android 패키지 이름은 앱 프로젝트의 app 폴더의 build.gradle 파일 내부에 있는 applicationId 값을 입력한다.
android {
    compileSdkVersion 28

    lintOptions {
        disable 'InvalidPackage'
    }

    defaultConfig {
        applicationId "com.h4u.flutter_firebase" // 패키지 이름
        minSdkVersion 16
        targetSdkVersion 28
        versionCode flutterVersionCode.toInteger()
        versionName flutterVersionName
        testInstrumentationRunner "android.support.test.runner.AndroidJUnitRunner"
    }
    ...
}
앱의 닉네임은 원하는 이름을 부여하고, 디버그 서명 인증서 SHA-1 값 입력은 생략하고 앱 등록을 선택한다.
다음으로 구성 파일 다운로드 항복에서 google-services.json 파일을 다운로드한다.

다운로드한 json파일을 Flutter 앱의 Android/app 폴더에 복사한다.
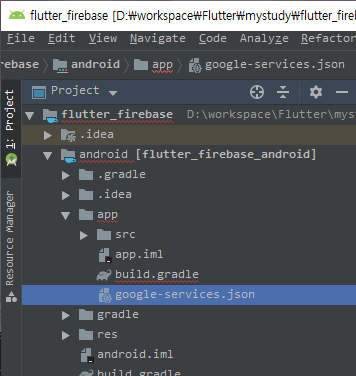
다음으로 Flutter 앱에 Firebase 설정을 추가할 차례이다.
우선 Flutter 앱의 Android 폴더의 build.gradel 파일을 수정한다.
buildscript {
    repositories {
        google()
        jcenter()
    }

    dependencies {
        classpath 'com.android.tools.build:gradle:3.5.1' // 버전 수정
        classpath 'com.google.gms:google-services:4.3.2' // 추가
    }
}

allprojects {
    repositories {
        google()
        jcenter()
    }
}

rootProject.buildDir = '../build'
subprojects {
    project.buildDir = "${rootProject.buildDir}/${project.name}"
}
subprojects {
    project.evaluationDependsOn(':app')
}

task clean(type: Delete) {
    delete rootProject.buildDir
}
다음으로 Android/app 폴더의 build.gradle 파일을 수정한다.
def localProperties = new Properties()
def localPropertiesFile = rootProject.file('local.properties')
if (localPropertiesFile.exists()) {
    localPropertiesFile.withReader('UTF-8') { reader ->
        localProperties.load(reader)
    }
}

def flutterRoot = localProperties.getProperty('flutter.sdk')
if (flutterRoot == null) {
    throw new GradleException("Flutter SDK not found. Define location with flutter.sdk in the local.properties file.")
}

def flutterVersionCode = localProperties.getProperty('flutter.versionCode')
if (flutterVersionCode == null) {
    flutterVersionCode = '1'
}

def flutterVersionName = localProperties.getProperty('flutter.versionName')
if (flutterVersionName == null) {
    flutterVersionName = '1.0'
}

apply plugin: 'com.android.application'
apply from: "$flutterRoot/packages/flutter_tools/gradle/flutter.gradle"

android {
    compileSdkVersion 28

    lintOptions {
        disable 'InvalidPackage'
    }

    defaultConfig {
        applicationId "com.h4u.flutter_firebase" // 패키지 이름
        minSdkVersion 16
        targetSdkVersion 28
        versionCode flutterVersionCode.toInteger()
        versionName flutterVersionName
        testInstrumentationRunner "android.support.test.runner.AndroidJUnitRunner"
    }

    buildTypes {
        release {
            // TODO: Add your own signing config for the release build.
            // Signing with the debug keys for now, so `flutter run --release` works.
            signingConfig signingConfigs.debug
        }
    }
}

flutter {
    source '../..'
}

dependencies {
    implementation 'com.google.firebase:firebase-analytics:17.2.0' // 추가
    testImplementation 'junit:junit:4.12'
    androidTestImplementation 'com.android.support.test:runner:1.0.2'
    androidTestImplementation 'com.android.support.test.espresso:espresso-core:3.0.2'
}

apply plugin: 'com.google.gms.google-services' // 추가
수정한 파일을 반영하기 위해서는 IDE의 'Sync now'란 버튼을 클릭하라고 Firebase 사이트에서는 안내되어 있지만 웬일인지 본인의 Android Studio에는 이 버튼이 없다. 예전엔 있었던 것 같은데...
대신 build.gradle 파일을 수정하는 편집창 상단에 "Open for Editing in Android Studio" 버튼을 클릭한다.

그리고 "New Window"를 선택하여 build.gradle 파일을 수정할 수 있는 새로운 Android Studio를 실행한다.

그럼 새 창이 뜨면서 build.gradle 파일의 Sync가 시작된다.
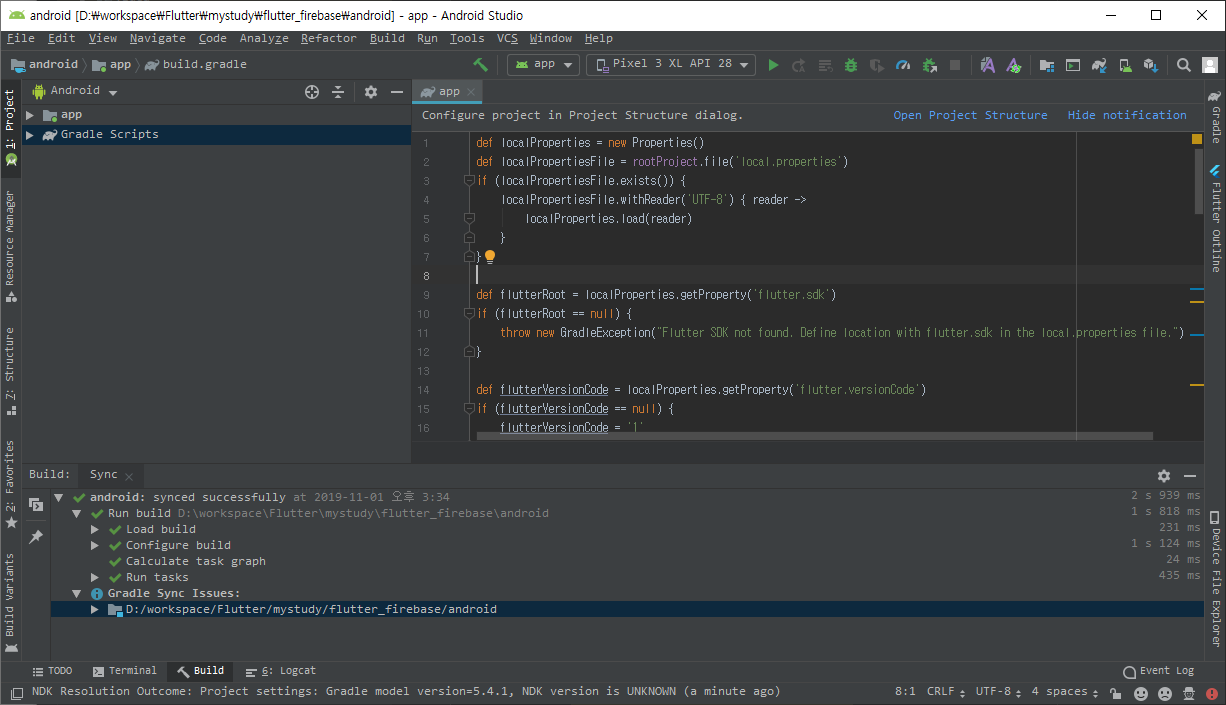
위와 같이 모든 Sync 작업이 완료되면 성공이다.
* 실제 Sync 작업에서 에러가 발생하는 경우가 많다. 본인의 경우 첫 번째 build.gradle 파일의 dependencies 항목의 설정 때문에 발생하는 경우가 많았다. build에 사용할 gradle의 버전이나 사용할 google-services의 버전이 업데이트되면서 꼬이는 경우가 대부분이었다.
4. 연동 확인
다음으로는 앱을 실행시켜 Firebase와 연동되는지를 확인한다.
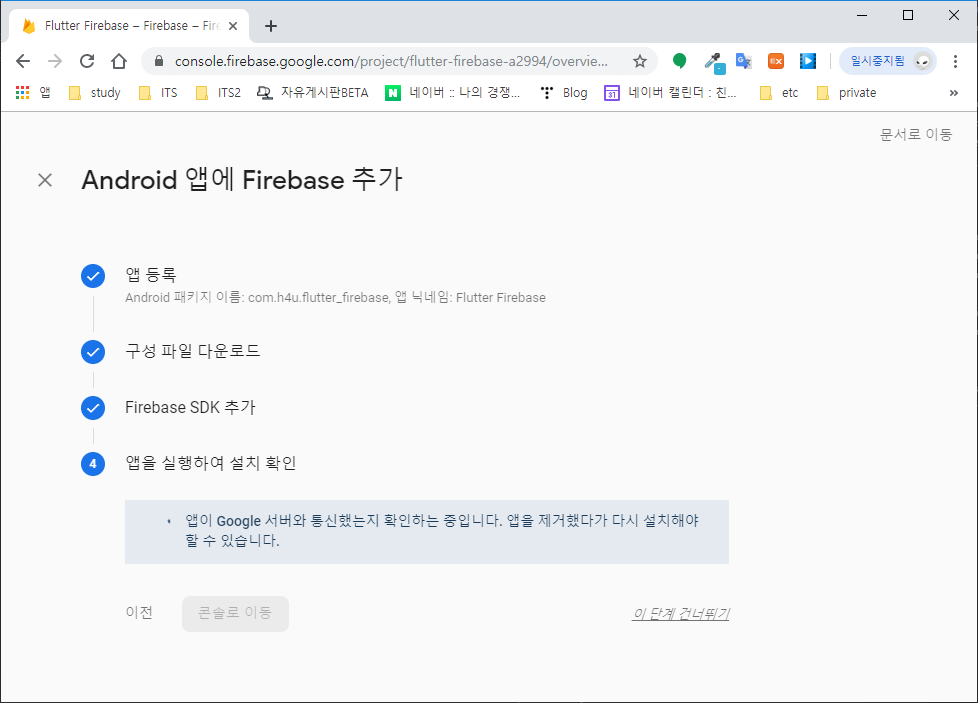
Android Studio에서 실행 버튼을 클릭하여 앱을 실행시켜보자.

위의 앱은 Android Studio에서 Flutter 프로젝트를 생성하면 기본으로 생성되는 기본 앱이다. 그리고 우리는 아무런 코드도 작성하지 않았다. 다만 앞서 수행한 작업들에 의해 이 앱이 Firebase와 통신할 수 있는 환경이 설정된 것이다.
앱이 실행된 후 다음과 같이 설치 확인이 되면 성공이다.

위 화면은 Flutter 앱에 설정한 Firebase 설정이 정상적으로 설정되어서 Firebase 서버와 정상 연동됨을 확인했다는 의미이다.
자 다시 Firebase의 프로젝트 콘솔 페이지로 이동해보자.

Flutter Firebase 프로젝트 명 하단에 방금 추가한 Flutter Firebase라는 안드로이드 앱이 추가된 것을 확인할 수 있으며 화면 우측에 지난 30분 동안의 사용자로 1명이 표시되는 것을 확인할 수 있다. 이 1명은 방금 에뮬레이터를 통해 실행한 앱을 의미한다.
이번 시간에는 Flutter 앱에 Firebase를 연동하는 방법에 대해 알아봤다.
이 작업이 완료되면, 앞 서 잠깐 살펴본 인증, 데이터베이스, 스토리지, 호스팅, 함수 등의 기능을 앱을 통해 이용할 수 있게 될 것이다(사실 본인도 아직 해보지 않았다.)
앞으로 이 개발 기능들을 하나씩 살펴보도록 하겠다.
'Development > Flutter' 카테고리의 다른 글
| Flutter 강좌 - [Firebase] 이메일을 이용한 Firebase 인증(Authentication) 방법 (14) | 2019.11.11 |
|---|---|
| Flutter 강좌 - [Firebase] 구글 로그인(Google Sign in) 사용법 (2) | 2019.11.04 |
| Flutter 강좌 - Provider 사용법 | How to use Flutter Provider (3) | 2019.10.31 |
| Flutter 강좌 - StatelessWidget과 StatefulWidget의 차이점과 사용법 (6) | 2019.10.25 |
| Flutter 강좌 - 앱 배포하기 후기 | 구글마켓등록시간 (6) | 2019.10.23 |


