| 일 | 월 | 화 | 수 | 목 | 금 | 토 |
|---|---|---|---|---|---|---|
| 1 | 2 | 3 | 4 | 5 | 6 | 7 |
| 8 | 9 | 10 | 11 | 12 | 13 | 14 |
| 15 | 16 | 17 | 18 | 19 | 20 | 21 |
| 22 | 23 | 24 | 25 | 26 | 27 | 28 |
- HTTP
- AppBar
- Hello World
- Column Widget
- InkWell
- Snackbar
- Flutter 강좌
- Flutter Tutorial
- Load Image
- ListTile
- sqlite
- Flutter 앱 배포
- Row
- Row Widget
- listview
- CrossAxisAlignment
- navigator
- Cached Image
- flutter
- 반석천
- ListView.builder
- Networking
- Flutter Example
- Flutter 예제
- node.js
- Image.network
- MainAxisAlignment
- FutureBuilder
- WillPopScope
- Scaffold
- Today
- Total
꿈꾸는 시스템 디자이너
Flutter 강좌 - Statefull widget | 상호작용 기능 본문
Flutter 강좌 목록 : https://here4you.tistory.com/120
지난 강좌에서는 레이아웃을 구성하는 방법에 대해서 알아보았다. 지난 강좌까지는 앱과 사용자간의 상호작용이 없는 StatelessWidget만을 이용했다. 상호작용 기능을 넣기 위해서는 Satefulwidget 클래스를 이용한다.
기존 코드를 다음과 같이 수정한다.
import 'package:flutter/material.dart';

// MyApp을 시작 위젯으로 설정하여 앱을 실행
void main() => runApp(MyApp());

// 앱의 시작점에 해당하는 위젯
class MyApp extends StatelessWidget {

  @override
  Widget build(BuildContext context) {

    // 본 앱의 테마의 대표색상을 필드에 저장
    Color color = Theme.of(context).primaryColor;

    // 버튼 로우 구성을 위한 컨테이너 위젯
    Widget buttonSection = Container(
      child: Row( // 로우를 자식으로 가짐
        mainAxisAlignment: MainAxisAlignment.spaceEvenly, // 자식들이 여유 공간을 공편하게 나눠가짐
        children: <Widget>[ // 세개의 위젯들을 자식들로 가짐
          _buildButtonColumn(color, Icons.call, 'CALL'),
          _buildButtonColumn(color, Icons.near_me, 'ROUTH'),
          _buildButtonColumn(color, Icons.share, 'SHARE')
        ],
      ),
    );

    // 매트리얼앱을 생성하여 반환
    return MaterialApp(
        title: 'Flutter Layout Demo', // 앱의 타이틀
        theme: ThemeData( // 앱의 테마 설정
          primarySwatch: Colors.red,  // 주요 테마 색상
        ),
        // 홈 설정. 홈은 메트리얼앱의 시작점
        home:Scaffold(
          appBar: AppBar(
            title: Text("Flutter layout demo"),
          ),
          // 기존 body 삭제
          // body: Center(
          // child: Text("Hello World"),
          // ),
          // 새로운 body 선언
          // body: Column( // 컬럼으로 교체
          body: ListView( // 리스트뷰로 교체
            // 자식들을 추가
            children: <Widget>[
              // 이미지 추가
              Image.asset(
                'images/lake.jpg',
                width: 600,
                height: 240,
                fit: BoxFit.cover,
              ),
              titleSection,  // titleSection 컨테이너 추가
              buttonSection,  // buttonSection 컨테이너 추가
              textSection // textSection 컨테이너 추가
            ],
          ),
        )
    );
  }

  // 타이틀 로우 구성을 위한 컨테이터 위젯 구현
  Widget titleSection = Container(
    // 컨테이너 내부 상하좌우에 32픽셀만큼의 패딩 삽입
    padding: const EdgeInsets.all(32),
    // 자식으로 로우를 추가
    child: Row(
      // 로우에 위젯들(Expanded, Icon, Text)을 자식들로 추가
      children: <Widget>[
        // 첫번째 자식
        Expanded(
          // 첫번째 자식의 자식으로 컬럼 추가
          child: Column(
            crossAxisAlignment: CrossAxisAlignment.start, // 자식들을 왼쪽정렬로 배치함
            // 컬럼의 자식들로 컨테이너와 텍스트를 추가
            children: <Widget>[
              // 컬럼의 첫번째 자식 컨테이너
              Container(
                padding: const EdgeInsets.only(bottom: 8), // 컨테이너 내부 하단에 8픽셀만큼 패딩 삽입
                child: Text(  // 컨테이너의 자식으로 텍스트 삽입
                  "Oeschinen Lake Campground",
                  style: TextStyle(
                      fontWeight: FontWeight.bold // 텍스트 강조 설정
                  ),
                ),
              ),
              // 컬럼의 두번째 자식으로 텍스트 삽입
              Text(
                'Kandersteg, Switzerland',
                style: TextStyle(
                    color: Colors.grey[500] // 텍스트의 색상을 설정
                ),
              )
            ],
          ),
        ),
        // 두번째 자식 아이콘
//        Icon(
//          Icons.star, // 별모양 아이콘 삽입
//          color: Colors.red[500], // 빨간색으로 설정
//        ),
//        // 세번째 자식
//        Text('43')  // 텍스트 표시

        // 기 작성된 두번째 세번째 자식을 삭제하고, FavoriteWidget 위젯 추가
        FavoriteWidget()
      ],
    ),
  );

  // 버튼과 텍스트로 구성된 컬럼을 생성하여 반환하는 함수
  Column _buildButtonColumn(Color color,IconData icon, String label){...}

  // 텍스트로 구성된 컨테이너를 구현하는 위젯
  Widget textSection = Container(...);
}

// StatefulWidget을 상속하는 클래스
class FavoriteWidget extends StatefulWidget {
  @override
  _FavoriteWidgetState createState() => _FavoriteWidgetState();

}

class _FavoriteWidgetState extends State<FavoriteWidget>{

  bool _isFavorited = true;
  int _favoriteCount = 41;

  @override
  Widget build(BuildContext context) {

    // 로우를 생성
    return Row(
      mainAxisSize: MainAxisSize.min,
      children: <Widget>[
        // 컨테이너 생성
        Container(
          padding: EdgeInsets.all(0),
          child: IconButton(
              icon: (_isFavorited ? Icon(Icons.star) : Icon(Icons.star_border)),
              color: Colors.red[500],
              // 아이콘 버튼을 클릭하면 _toggleFavorite 함수를 호출
              onPressed: _toggleFavorite
          ),
        ),
        // 텍스트를 출력하는 SizedBox 추가
        SizedBox(
          width: 18,
          child: Container(
            child: Text('$_favoriteCount'),
          ),
        )
      ],
    );
  }

  // 아이콘 버튼을 클릭하면 호출
  void _toggleFavorite() {
    setState(() {
      if(_isFavorited){
        _favoriteCount -= 1;
        _isFavorited = false;
      }else{
        _favoriteCount += 1;
        _isFavorited = true;
      }
    });
  }
}
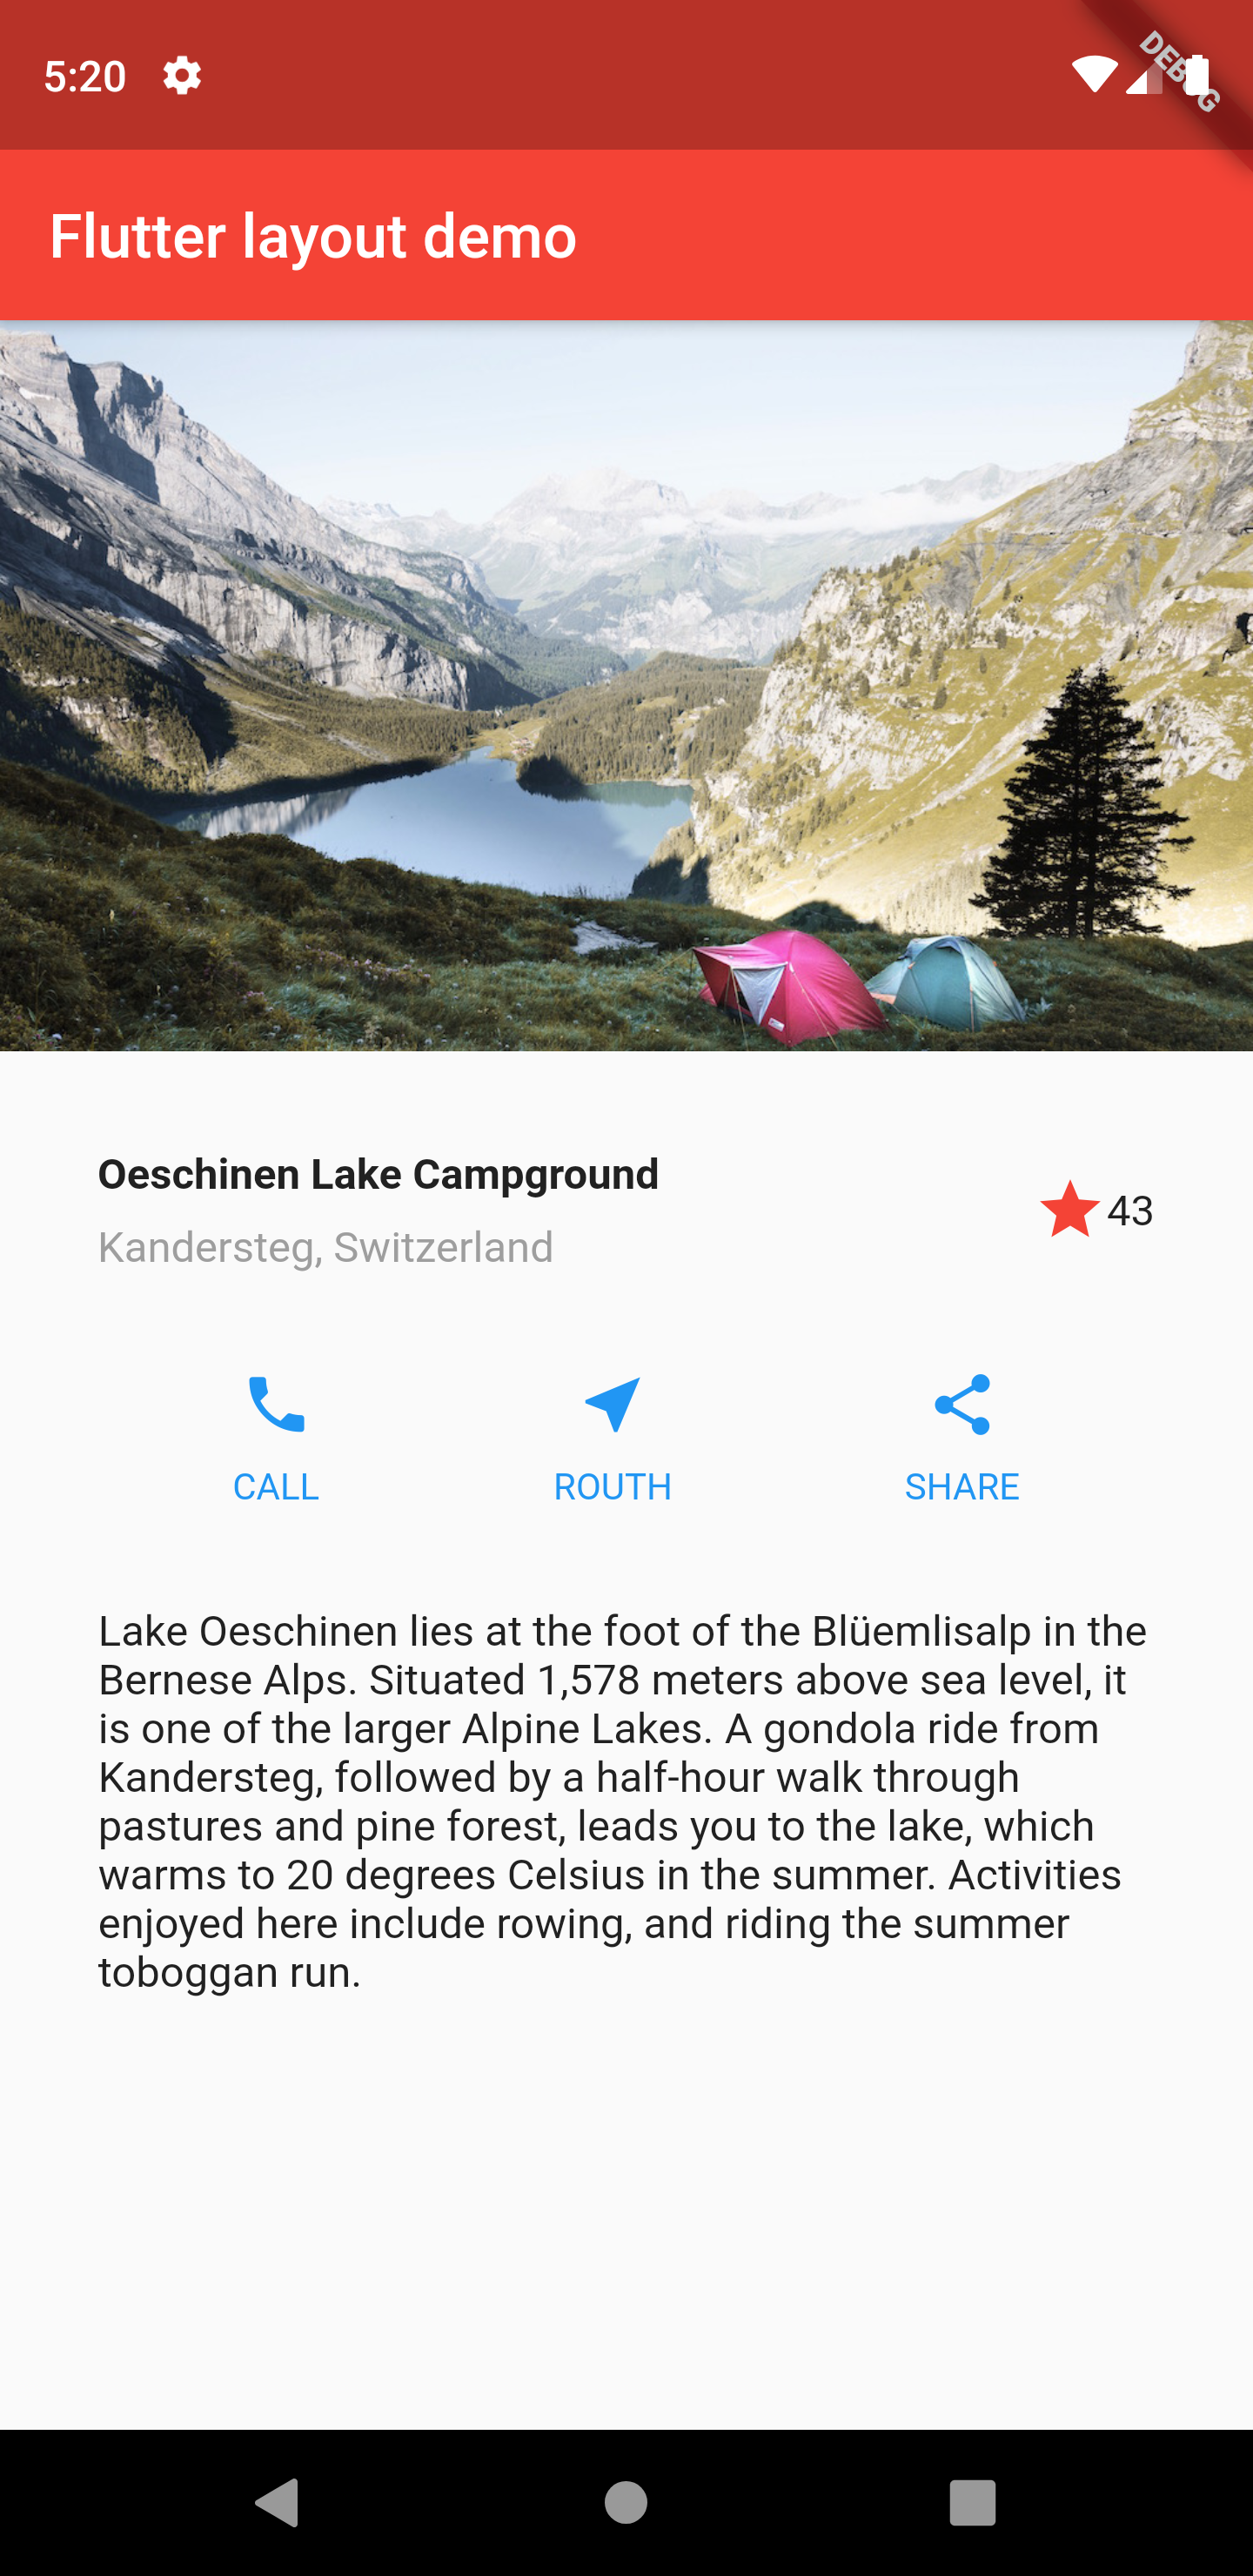
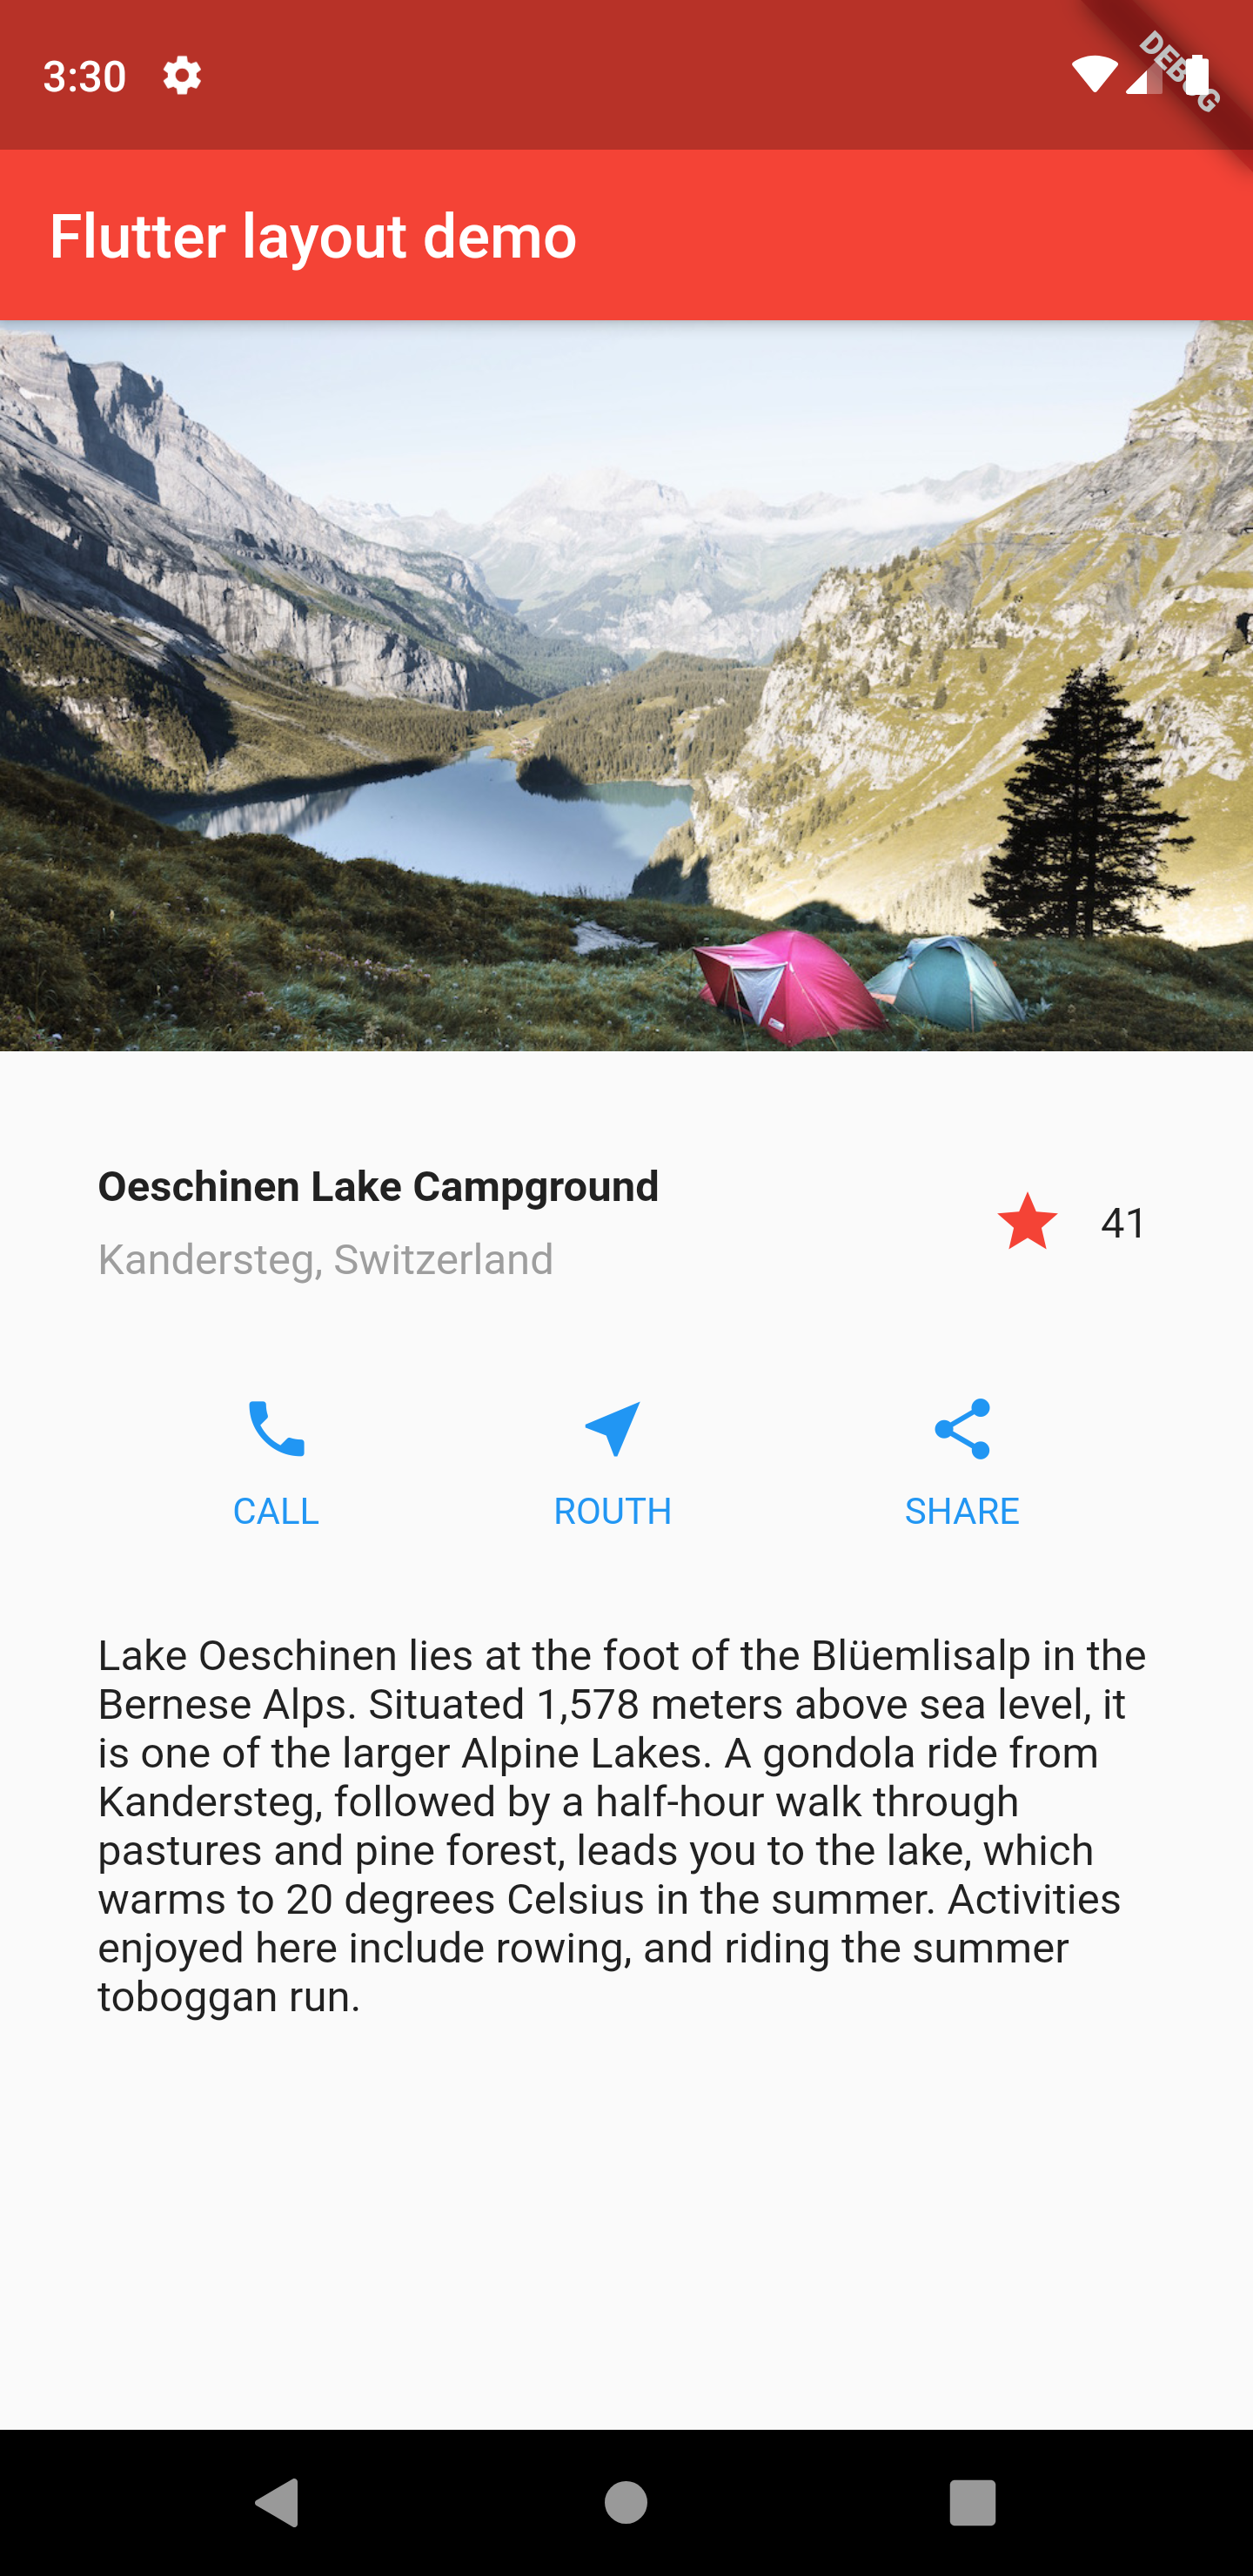
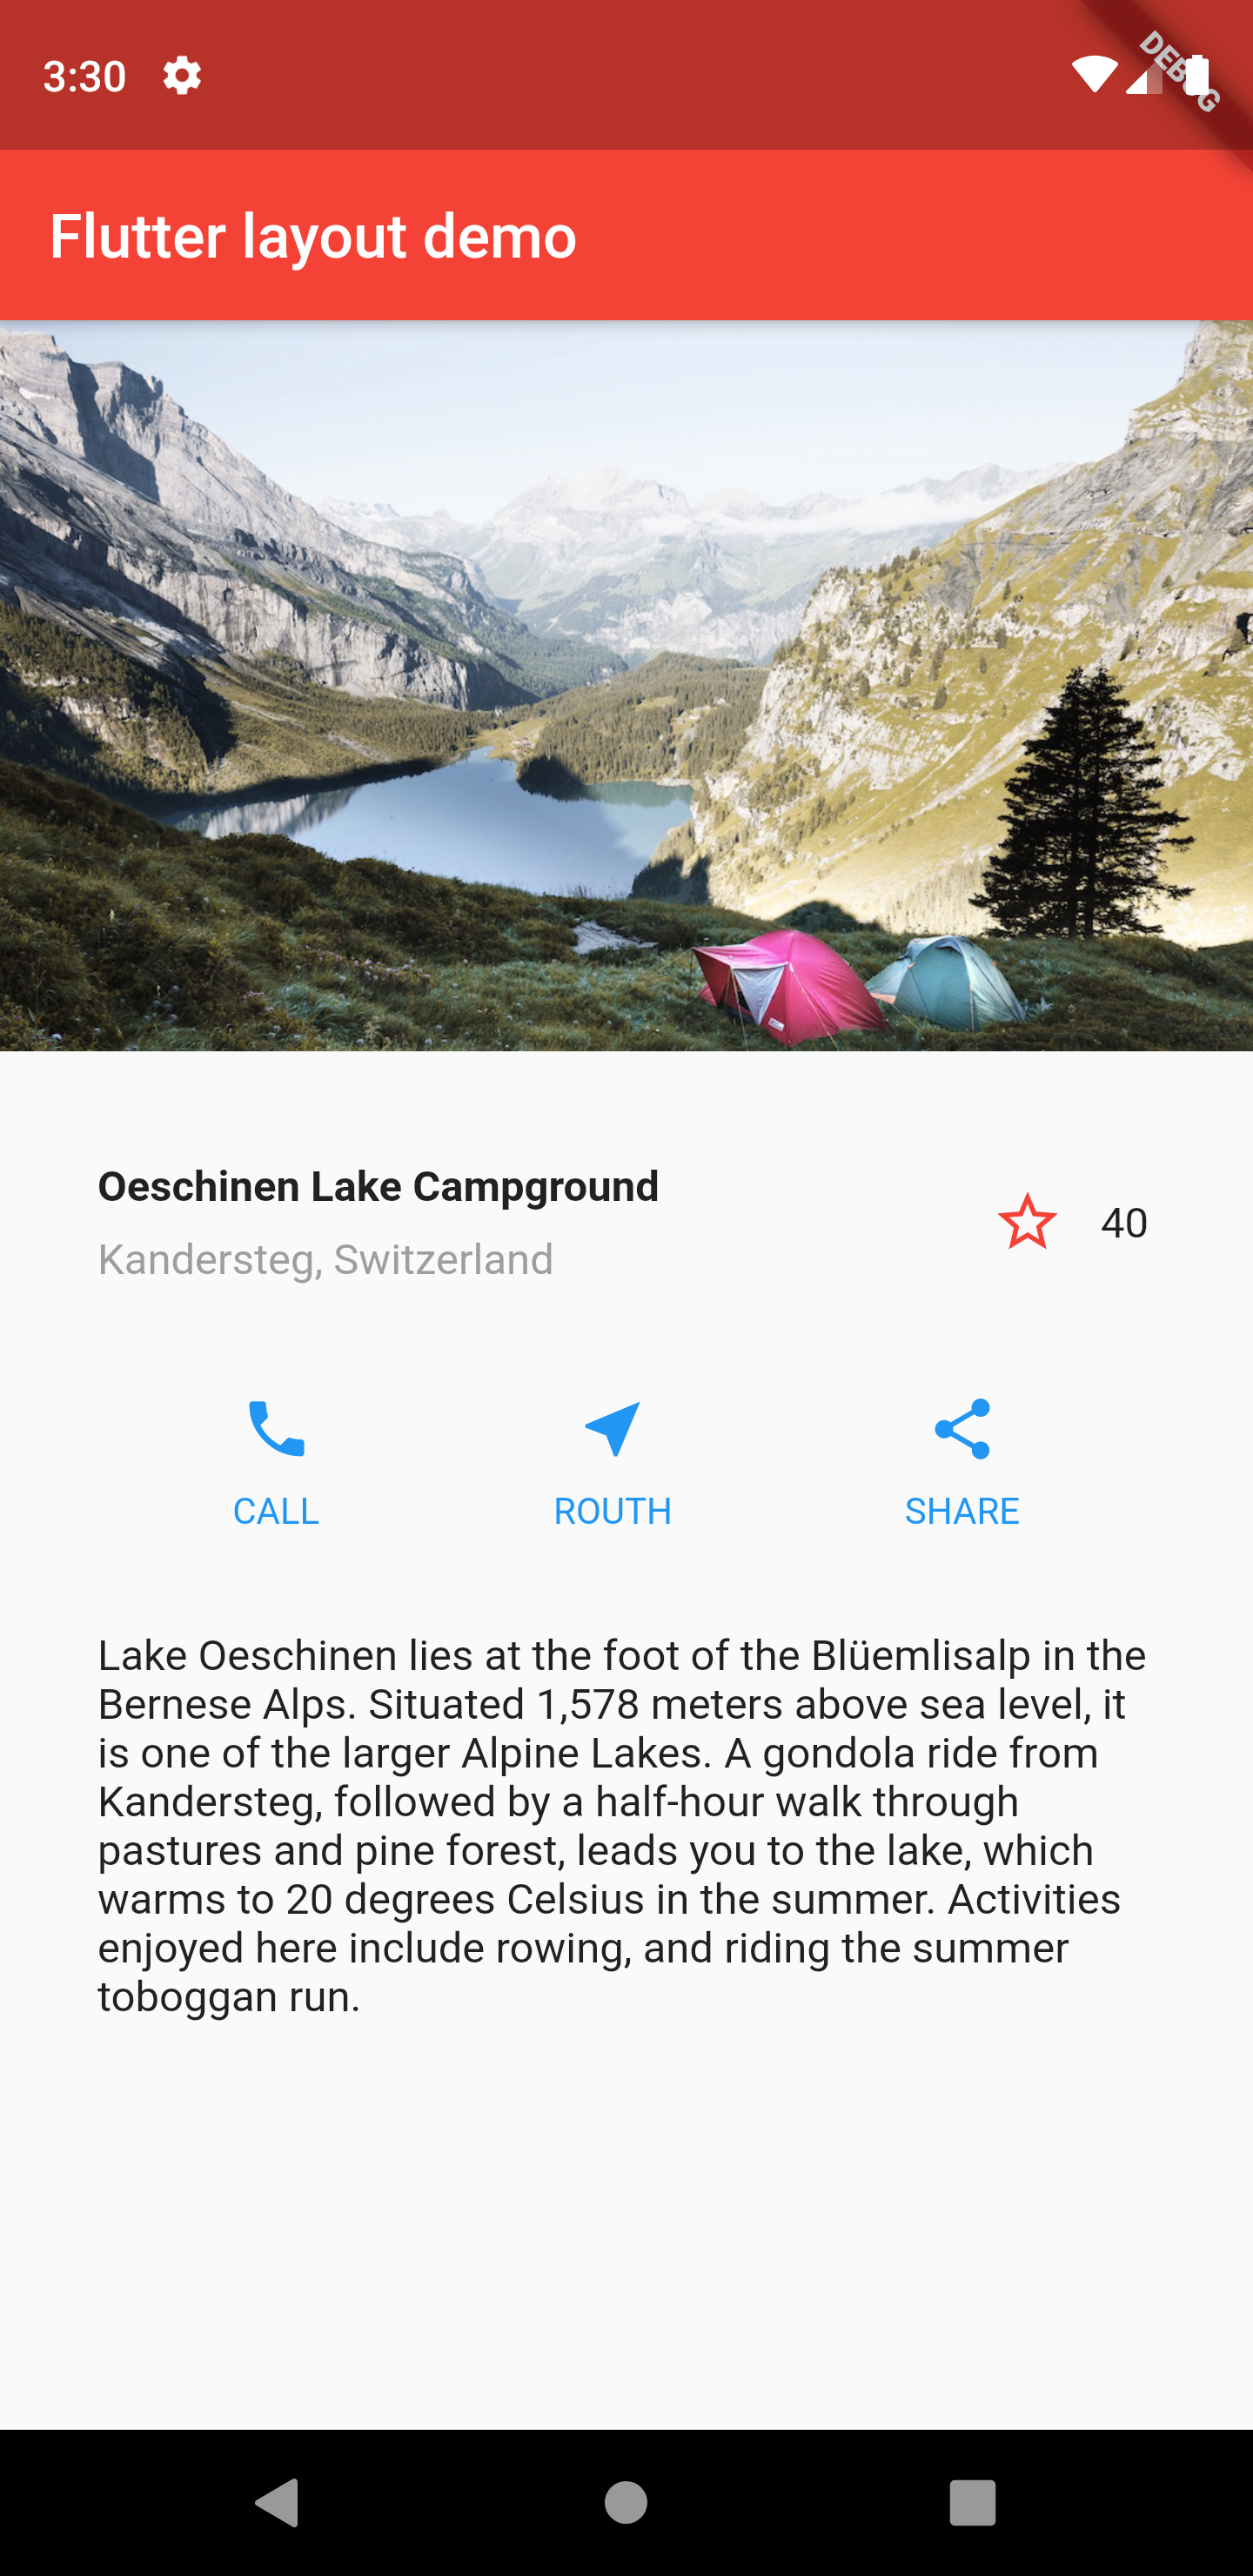
상호작용 기능을 부여할 부분은 titleSection이다. 별표를 클릭하면 토글되면서 숫자가 증가하거나 감소하는 기능이다.

소스코드를 살펴보면, 기존의 titleSection을 수정하였다. 로에 등록했던 두번째 세번째(별표 아이콘과 숫자 텍스트) 자식을 삭제하고 FavoriteWidget()을 추가하였다.
FavoriteWidget 클래스는 StatefulWidget 클래스를 상속한다. FavoriteWidget 클래스는 createState 함수를 통해서 State 클래스를 상속하는 _FavoriteWidgetState 클래스를 호출한다.
* 클래스나 필드명을 _(언더바)로 시작할 경우 private 으로 설정된다고 한다.
_FavoriteWidgetState 클래스의 build 함수를 확인하면, 로우를 생성하여 반환하는데 기존의 titleSection에서 직접 구현했던 두번째 세번째 자식에 해당하는 IconButton과 Text를 다시 구현하고 있다. 별 모양의 IconButton을 클릭할 때 _toggleFavorite 함수가 호출되도록 onPressed 항목에 _toggleFavorite 함수를 등록한다.
_toggleFavorite 함수는 클릭될 때마다 bool 값을 확인해서 별 모양 아이콘의 모양과 숫자를 변경하게 된다.


본 강좌는 Flutter 공식 사이트의 문서를 참고하여 작성되었습니다.
https://flutter.dev/docs/development/ui/interactive
Flutter Code Examples 강좌를 추천합니다.
- 제 블로그에서 Flutter Code Examples 프로젝트를 시작합니다.
- Flutter의 다양한 예제를 소스코드와 실행화면으로 제공합니다.
- 또한 모든 예제는 Flutter Code Examples 앱을 통해 테스트 가능합니다.
Flutter Code Examples 강좌로 메뉴로 이동
Flutter Code Examples 강좌 목록 페이지로 이동
Flutter Code Examples 앱 설치 | Google Play Store로 이동
Flutter Code Examples - Google Play 앱
Are you a beginner at Flutter? Check out the various features of Flutter through the demo. Source code for all demos is also provided.
play.google.com
'Development > Flutter' 카테고리의 다른 글
| Flutter 강좌 - Navigate with named routes | 이름을 통한 라우트간 이동 (1) | 2019.06.24 |
|---|---|
| Flutter 강좌 - Screen Naviation | 화면(라우트)간 이동 (3) | 2019.06.24 |
| Flutter 강좌 - Layout Tutorial | 레이아웃 구성 (4) | 2019.06.10 |
| Flutter 강좌 - Using Material Components | Scaffold 컴포넌트 사용법 (2) | 2019.06.10 |
| Flutter 강좌 - Basic widgets | 기본 위젯 (4) | 2019.06.10 |


