Flutter 강좌 - 앱 시작 화면 수정 방법 | 네이티브 스플래쉬 스크린 수정 | Native Splash Screen Customazing
Flutter Code Examples 강좌를 추천합니다.
- 제 블로그에서 Flutter Code Examples 프로젝트를 시작합니다.
- Flutter의 다양한 예제를 소스코드와 실행화면으로 제공합니다.
- 또한 모든 예제는 Flutter Code Examples 앱을 통해 테스트 가능합니다.
Flutter Code Examples 강좌로 메뉴로 이동
Flutter Code Examples 강좌 목록 페이지로 이동
Flutter Code Examples 앱 설치 | Google Play Store로 이동
Flutter Code Examples - Google Play 앱
Are you a beginner at Flutter? Check out the various features of Flutter through the demo. Source code for all demos is also provided.
play.google.com
Flutter 강좌 시즌2 목록 : https://here4you.tistory.com/149
Flutter 앱을 개발해서 실행을 해보면 실제로 개발한 첫번째 페이지(스크린)이 생성되어 출력되기 전에 약 1초 정도 하얀색 화면이 먼저 출력된다. 첫번째 인트로 페이지를 아무리 멋지게 구성해도 인트로 페이지가 출력되지 전에 하얀색 스크린이 먼저 출력되니 앱의 품격(?)이 떨어지게 된다.
우선 앱 실행 초기에 잠시 출력되는 스크린을 네이티브 스플래쉬(Native Splash) 스크린이라고 한다. Flutter 앱은 멀티 플랫폼을 지원하는 크로스 플랫폼 앱이다. 하지만 실제 안드로이드나 iOS의 입장에서 보면 각 플랫폼의 네이티브 앱이 먼저 실행된 후 Flutter 앱으로 점프하는 방식이고 개발한 Flutter 앱이 실행되기 전에 각 플랫폼의 네이티브 스크린이 잠식 출력되게 되면서 발생하는 문제다.
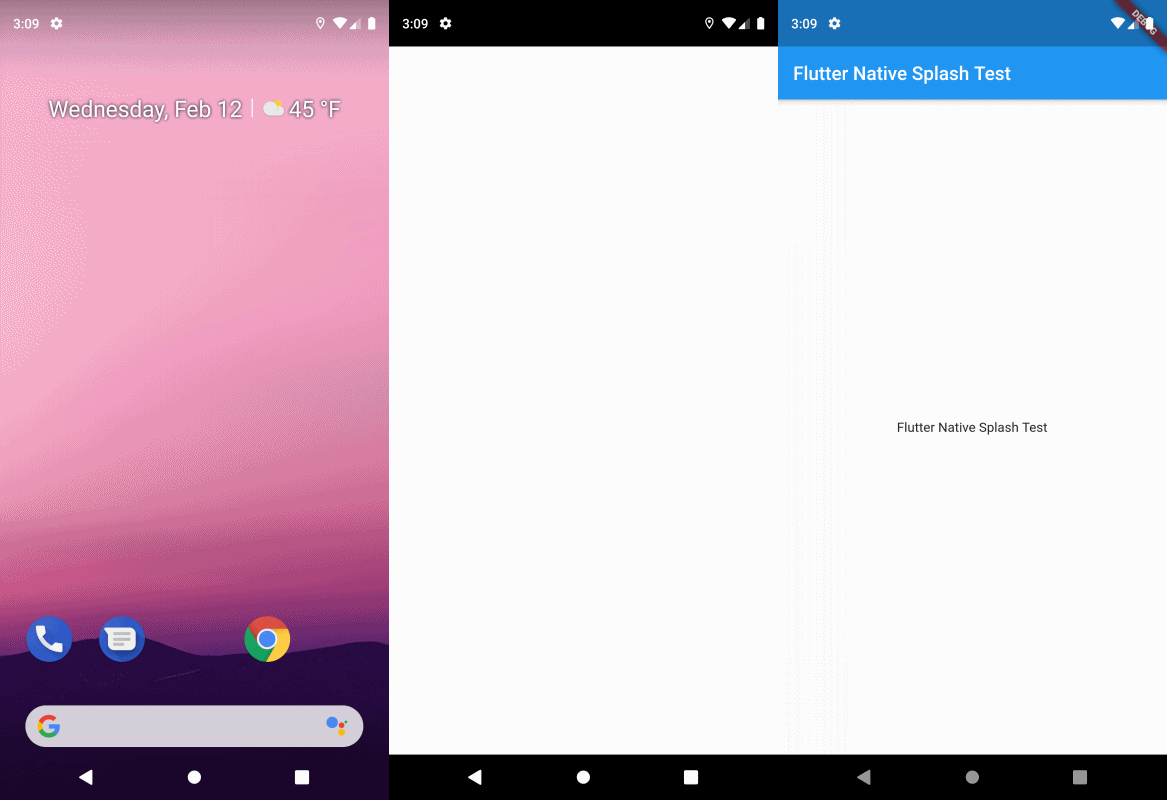
해당 현상은 다음과 같다.

바탕화면에서 Flutter 앱의 화면이 출력되는 사이에 하얀색 페이지가 잠시 나타나는 것을 확인할 수 있다.
해결방법은 기본 네이티브 스플래쉬 스크린을 앱의 스타일에 맞게 커스터마이징 하는 것이다. 이미 이를 지원하는 플러그인이 존재한다.
* Plug-In
https://pub.dev/packages/flutter_native_splash
flutter_native_splash | Dart Package
Automatically generates native code for adding splash screens in Android and iOS. Customize with specific platform, background color and splash image.
pub.dev
플러그인 설치를 위해 pubspec.yaml 파일의 dev_dependencies 항목에 플러그인을 추가한다.
dev_dependencies:
  flutter_native_splash: ^0.1.9
그리고 pubspec.yaml 파일 하단에 네이티브 스플래쉬 스크린의 배경색을 설정하는 내용을 추가한다.
flutter_native_splash:
  color: "42a5f5"
설정을 마쳤으며 터미널에서 다음의 명령어를 실행한다.
> flutter pub pub run flutter_native_splash:create
명령어를 실행하면 다음과 같이 안드로이드와 iOS의 네이티브 스플래쉬 스크린이 업데이트되는 것을 확인할 수 있다.
D:\workspace\Flutter\mywork\native_splash_test>flutter pub pub run flutter_native_splash:create
[Android] Updating colors.xml with color for splash screen background
[Android] Updating styles.xml with full screen mode setting
[iOS] Updating LaunchScreen.storyboard with width, height and color
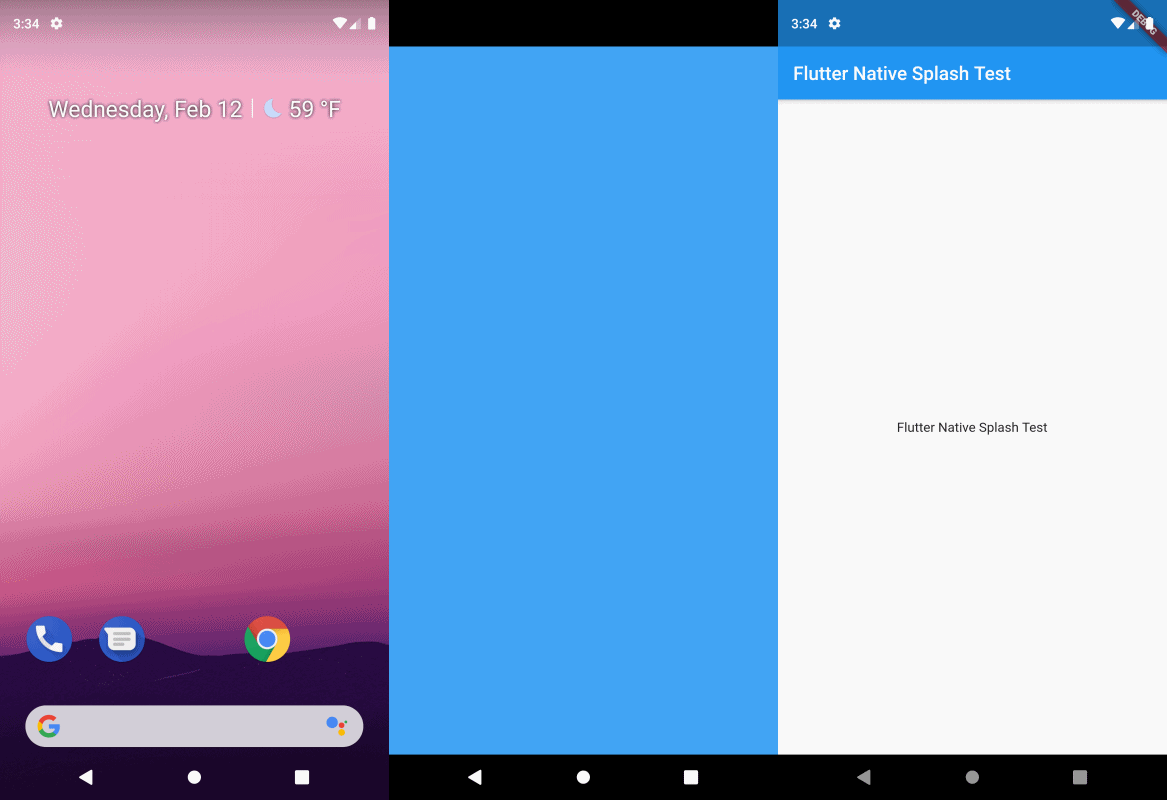
앱을 실행해보면 다음과 같이 네이티브 스플래쉬 스크린의 배경색이 변경되는 것을 확인할 수 있다.

배경색이 앱의 테마와 같은 색으로 처리되니 한결 매끄럽게 실행되는 것처럼 느껴진다.
네이티브 스크린에 이미지를 추가할 수도 있다.
프로젝트 root에 assets 폴더를 생성하고 이미지 파일을 추가한 후 pubspec.yaml 파일의 설정에 이미지의 위치를 추가한다.
flutter_native_splash:
  image: assets/ic_launcher.png
  color: "42a5f5"
다시 네이티브 스크린을 업데이트 한다.
D:\workspace\Flutter\mywork\native_splash_test>flutter pub pub run flutter_native_splash:create
[Android] Creating splash images
[Android] Updating launch_background.xml with splash image path
[Android] Updating colors.xml with color for splash screen background
[Android] Updating styles.xml with full screen mode setting
[iOS] Creating splash images
[iOS] Updating LaunchScreen.storyboard with width, height and color
이번에는 이미지 파일이 추가로 업데이트 되는 것을 확인할 수 있다.
앱을 실행해 보자.
본인의 경우에는 이미지가 출력되지 않고 기존의 배경색만 수정된 상태로 변화없이 출력이 되었다.
뭐 안드로이드 스튜디오나 플러그인이 내 맘대로 동작 안해준 것이 한 두 번도 아닌데.. 슬슬 원인을 찾아 해결해 보자.
본인의 경우 이미지 파일로 Flutter 의 기본 런처 이미지인 ic_launcher.png를 사용했다.
우선 네이티브 코드가 있는 android > src > main > res 폴더로 이동해 보자

assets 폴더에 넣었던 ic_launcher.png 파일이 네이티브의 res > drawable의 각 해상도 폴더로 splash.png 파일로 이름이 변경되어 이동된 것을 확인할 수 있다. 실제 파일을 눌러보면 ic_launcher.png과 동일한 이미지가 출력된다.
다음으로 drawable 폴더의 launch_background.xml 파일을 보자.
<?xml version="1.0" encoding="utf-8"?>
<!-- Modify this file to customize your launch splash screen -->
<layer-list xmlns:android="http://schemas.android.com/apk/res/android">
    <item android:drawable="@color/splash_color" />

    <!-- You can insert your own image assets here -->
    <!-- <item>
        <bitmap
            android:gravity="center"
            android:src="@mipmap/launch_image" />
    </item> -->

</layer-list>
첫번째 아이템으로 splash_color 항목이 있는데 정상 반영되었으니 배경색이 변경되었을 것이다. 문제는 이미지를 출력하는 코드가 존재하지 않는다. 플러그인 사이트의 git repository를 둘러보니 두번째 아이템으로 이미지가 추가되어야 한다. 코드를 다음과 같이 변경하자.
<?xml version="1.0" encoding="utf-8"?>
<!-- Modify this file to customize your launch splash screen -->
<layer-list xmlns:android="http://schemas.android.com/apk/res/android">
    <item android:drawable="@color/splash_color" />

    <item>
        <bitmap android:gravity="center" android:src="@drawable/splash" />
    </item>

</layer-list>
두번째 아이템으로 bitmap 이미지를 추가하면서 이미지의 경로를 drawable의 splash 파일로 지정한 것이다.
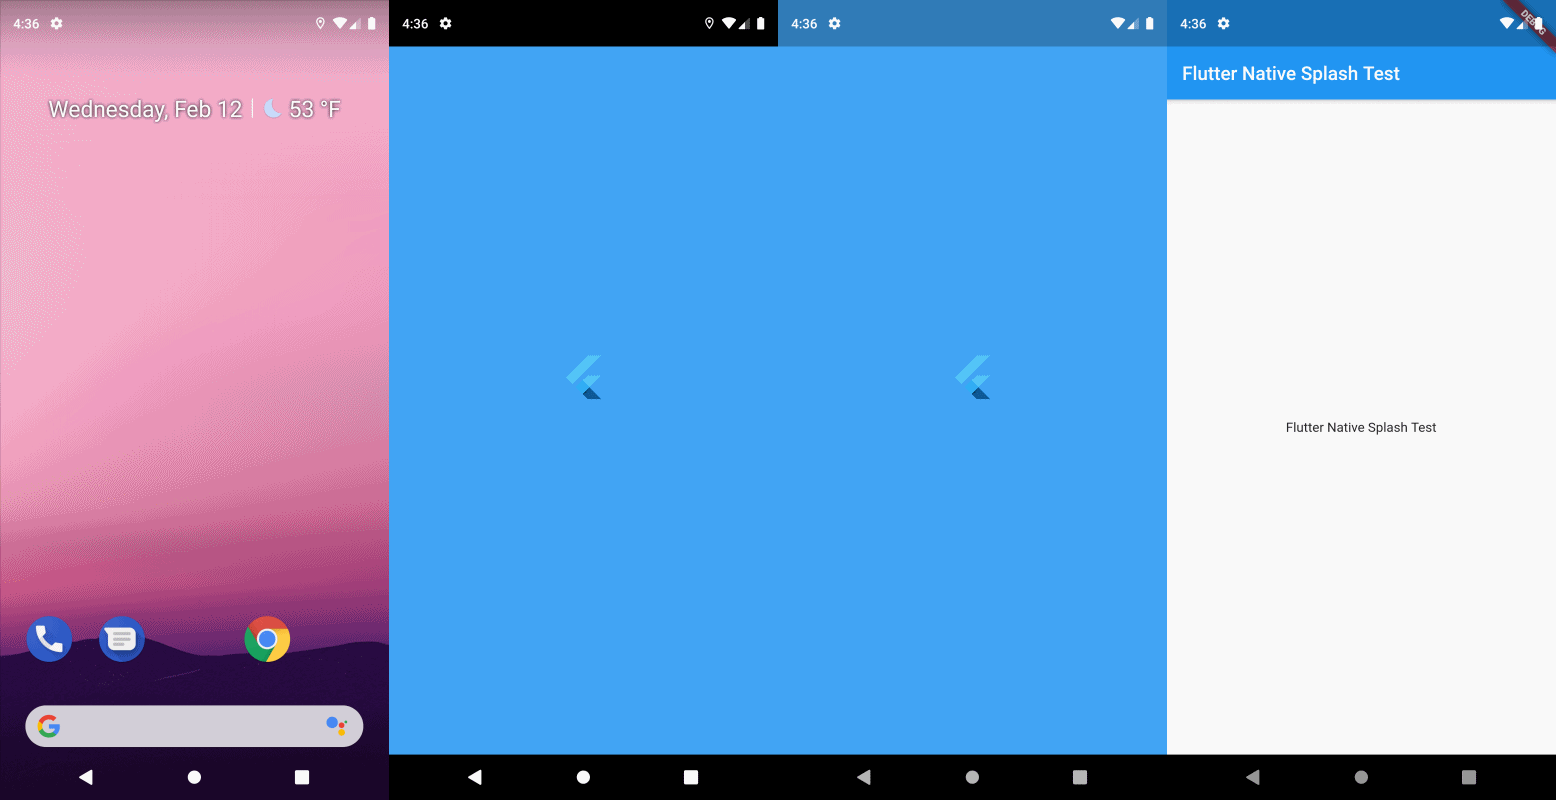
앱을 다시 실행해보면 다음과 같다.

이미지가 출력되지 시작했다. 그런데 이미지의 위치가 바뀌면서 흔들리는 느낌이 난다. 이것은 네이티브 스크린이 풀스크린(Fullscreen)으로 변경되면서 발생하는 것이다. 이를 해결하기 위해서는 values 폴더의 styles.xml 파일의 windowFullscreen 항목을 false로 변경한다.
앱을 다시 실행해보면 다음과 같다.

이미지의 위치 이동없이 정상적으로 네이티브 스크린이 출력되는 것을 확인할 수 있다.